Thursday, November 14, 2013

NYX Glitter Mania - Blue look

I've always seen the NYX Cosmetics Glitter Mania powders & thought they were amazing but never bought them because I knew I'd hardly use them. A few months ago I saw them on clearance for around $1.50 CAD each, so of course I couldn't resist. I bought 5 of them: Disco Ball, Purple, Blue, Gold, & Hot Gold.


As soon as I got home that night, I wanted to try applying the glitter on my eyelid using lash glue as a base because I don't have glitter glue. I used the Blue glitter & came up with this look in 5 minutes. Sorry for the crappy pic quality - it was late & I was a bit lazy.

The glitter was way more sparkly in person. You can see the sparkles better in the video I posted on Instagram when I did this look: http://instagram.com/p/eRHV-OrQ3z/. Yikes, just realized that I posted that video 2 months ago. That tells you how much I've been slacking with blogging.. oops!

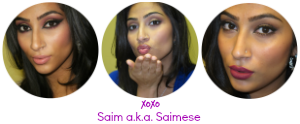
Even if I don't use these glitters myself, they are great to have in my kit now that I'm a certified makeup artist.

Have you tried these loose glitters or any other NYX Cosmetics' products?


Let me update you: BLOGLOVIN'INSTAGRAM FACEBOOK TWITTER
Read More »

Wednesday, October 30, 2013

Date Night Neutrals


As much as I love experimenting with colours & the majority of the makeup looks on this blog have been colourful, on a daily basis I tend to favour browns (that's if I'm wearing eyeshadow at all). Usually if I'm in a rush but want to wear some eyeshadow, I grab a dark brown eyeshadow & blend that into my crease with a large blending brush & I'm done!


Then there are those days where I still want to keep it neutral but I wanna look good!
This is the makeup look that I did on one of those kinda days. It's a great look if you're going on a date night with your girlfriends or even with a special someone because we all want to look hot on date night but not overdone - I mean, we're not going out; just dressed to impress.


For the eyeshadows, I used a large blending blush to apply MAC eyeshadow in Cranberry in the outer two-thirds of my crease + on my browbone + on my lower lashline (you could only see a hint of this colour depending on the lighting). I then applied Senna Cosmetics' Glow Eye Colour in Flare on my entire lid + inner corner of the eye + whatever was left on the brush under my brow. Lastly, I took BH Cosmetics' eyeshadow in MM17 on a smaller blending brush & blended that into the outer two-thirds of my crease + outer one-third of my lower lashline.
I finished off the eyes by applying a liquid eyeliner, mascara on the top & bottom lashes, tight-lining, & filling in my brows (using Senna Cosmetics' Sketch-a-Brow pencil in Mink) ever so slightly.


For the cheeks, I used Too Faced's Chocolate Soleil Matte Bronzer to contour my cheekbones, temples, & jawline. The blush I used is Barry M's Blusher in BL1 - Pink Orchid.
Lastly, for the pout I used one of my fav lip products at the moment: Senna Cosmetics' Lip Lacquer in Mulberry.


I also wanted to take a quick moment to thank everyone who has encouraged me to get back into blogging or even just asked about why I've been such a bad blogger. It's because of those comments & chats that I'm motivated to get back to blogging, so THANK YOU & lets do this.

Kisses to all of you!


Let me update you: BLOGLOVIN'INSTAGRAM FACEBOOK TWITTER
Read More »

Tuesday, August 6, 2013

Colour Burst


I wanted to play with my loose eyeshadows as I hardly use them on myself & I have some gorgeous colours.
I knew I wanted to use the yellow and this gorgeous colour by OCC called Cherry Bomb so I let those colours guide me & here's what I came up with.
On my eyes:
  • Too Faced Shadow Insurance Primer
  • NYX Cosmetics Jumbo Eye Pencil in Milk [base]
  • A red eyeshadow from the 120 eyeshadow palette - 1st edition [just on my lid]
  • Firefly from the Too Faced Smokey Eye palette [under the brow + on the browbone]
  • Smoking Jacket from the Too Faced Smokey Eye palette [above the crease & blended into the browbone]
  • Pari Beauty's Transforming Eye Gel [mixed with the loose eyeshadows to intensify the colours & help them stick]
  • Cherry Bomb loose colour by Obsessive Compulsive Cosmetics [on the lid]
  • Azure mineral pigment dust by Annabelle Cosmetics [lower lashline]
  • Sunny Side Up by Pure Luxe Cosmetics [inner corner]
  • Amethyst by Pure Luxe Cosmetics [transition colour above the crease between the yellow & dark purple]
  • Smokin Hot from the Too Faced Smokey Eye palette [slightly applied to darken the outer crease just a tad bit]
  • Black: liquid eyeliner + pencil eyeliner [tight line & waterline] + mascara
  • Falsies
I also used Senna Cosmetics' Sketch-a-Brow precision brow pencil in Mink.

On my face:
  • Revlon Colorstay liquid foundation in 250 Fresh Beige
  • Annabelle Cosmetics' skintrue concealer
  • Maybelline's Dream Matte Powder in Honey/Medium 3-4
  • Too Faced Chocolate Soleil matte bronzer [to contour my cheeks, jawline & temples]
  • Josie Maran Argan Illuminizer [cheekbones]
  • Dior Shimmer Powder in 002 Amber Diamond [cheekbones]
  • NARS blush in Taj Mahal
On my lips:
  • Sephora lip stain in 04

If you know me or have been on my blog, you know I love playing with colours, so I definitely had fun doing this. Hope you enjoyed the pictures as much as I enjoyed creating this look.

Let me update you: BLOGLOVIN'INSTAGRAM FACEBOOK TWITTER
Read More »

Thursday, May 30, 2013

Muted Sparkle

Since the beginning of this year, I have rarely touched my vibrant coloured eyeshadows while doing my eye makeup. It's quite a shame really and the looks that I do are nothing to blog about as I'm almost bare-faced with just a touch of concealer, mascara, blush, and tinted chapstick on most days.

This look is from a while ago and it's all about the neutrals, but I did put a little more effort into this look by adding some shimmery eyeshadow on my lids and toning it down with some matte shades.

Eyeshadows Used:
  • Cloves (Too Faced Smokey Eye palette) - all over the lid
  • Up in Smoke (Too Faced Smokey Eye palette): outer third of the lid + blended slightly above the crease + outer half of the lower lashline 
  • MAC eyeshadow in Mylar: tearduct + inner corner of the lid + inner half of the lower lashline + slightly brushed under the brow

These nails were around Valentine's Day, so I had chosen pink & added the heart on the accent nail.

Nailpolishes Used:
  • Mary Kay in Bold Fuchsia
  • Pure Ice in Don't You Wish (2-3 coats to get an even coating of the shimmer particles)
  • Hard Candy in Matte-ly in Love
  • Sally Hansen (Hard as Nails - Xtreme Wear) in White On - for the heart

I love how the nails turned out with a matte top coat over the shimmer particles. The muted sparkle nails are def something that I can see myself sporting on a regular basis.

Let me update you: BLOGLOVIN'INSTAGRAM FACEBOOK TWITTER
Read More »

Sunday, March 17, 2013

Stuffed Zucchini Boats

While browsing through Pinterest, I found a picture captioned "Stuffed Zucchini Boats". The recipe was easy and the boats looked great, so I knew I'd try it one day. That day came this week and mine turned out great!

I've never cooked zucchini before and I wasn't sure how tender it is. So I only looked at the recipe to make sure that it didn't mention boiling the zucchini first.


I'm not going to be providing exact measurements because I'm not sure about the quantities that I used. I didn't follow a recipe and I highly suggest that you let your taste buds guide you too.

Cut the zucchini in half lengthwise and scoop out the zucchini flesh.
In the recipe that I saw on Pinterest, this was done using a melon scooper/baller. I don't have one of those so I used a good old teaspoon and it worked just fine too.

Here are the ingredients that I chopped and mixed together to use for the filling:
  • Zucchini flesh (that you scooped out)
  • Red pepper
  • Yellow pepper
  • Scallions (also known as green onions, spring onions, etc.)
  • Onion
  • Carrot
  • Feta cheese
  • Ground beef (cooked with a bit of oil and salt)
  • Green chillies
  • Lemon juice
  • Cumin powder
  • Freshly ground black pepper
  • Salt
  • Olive Oil

Remember: These are just ingredients that I had and wanted to use. I originally planned on adding tomatoes, quinoa, boneless chicken (instead of ground beef), & cilantro too, but I had enough filling & then some more, so I didn't.

Lightly coat the bottom of a baking dish with olive oil. Place your filled zucchini boats in the dish and bake for 25 minutes.

& your Stuffed Zucchini Boats are ready to be served!


I had some filling leftover, so I served it in a bowl on the side.
I actually liked the room temperature filling mixture more than the baked one. If you'd like, you can bake the empty zucchini boats (with the flesh already scooped out) till they're tender. Once you've pulled them out of the oven, you can fill them up with the room temperature mixture.


The possibilities are endless.
Hope you try & enjoy!

Let me update you: BLOGLOVIN'INSTAGRAM FACEBOOK TWITTER
Read More »

Friday, February 1, 2013

Fierce Parrot


If you follow me on Instagram, you would have seen a preview of this look around a month ago. If you don't follow me already, search for "Saimese". Don't know what took me so long to join Instagram, but I'm way more active there than I am on any other social networking site.


Anyway, I was in the mood for something colourful and I really wanted to attempt a cut crease again. So here's the result. I love how it turned out. It's edgy but since I used bright colours, it looks super fun and somewhat wearable.


Keep on being fierce! ;)

Let me update you: BLOGLOVIN'INSTAGRAM FACEBOOK TWITTER
Read More »

Monday, December 31, 2012

Smokey Blue

This look reminds me of the Midnight Sky look that I posted earlier this year. It was a much more subtle version of the look though.


& of course, I'm still loving this blue eyeshadow (CS 18) from BH Cosmetics.

Let me update you: BLOGLOVIN'INSTAGRAM FACEBOOK TWITTER
Read More »

Thursday, October 25, 2012

Cranberry Gold

Another wedding, another makeup look.


I started off by applying the brown eyeshadow in my crease & was planning on stopping there but I had time so I played around some more.


Products Used:

Eyes:
  • Too Faced Shadow Insurance Primer [lid till under the brow + inner corner + lower lashline]
  • MAC eyeshadow in Cranberry [all over lid]
  • BH Cosmetics eyeshadow in MM17 [crease & blended upward toward the browbone + lower lashline]
  • Gold pencil eyeliner [tear duct + inner corner of lid & lower lashline + waterline]
  • Senna Cosmetics Glow Eye Color in Flare [under brow & over the areas where I applied the gold pencil eyeliner]
  • Maybelline waterproof liquid eyeliner in Black [upper lashline]
  • L'Oreal Voluminous Mascara in Carbon Black [upper & lower lashes]
  •  Senna Cosmetics' Sketch-a-Brow Pencil in Dark Taupe 

Lips:
  • C.O. Bigelow's Rose Salve [from Bath & Body Works]
  • Make Up For Ever Aqua Lip in 14C - Light Rosewood
Face:
  • Revlon Colorstay Foundation for combination/oily skin in 250 Fresh Beige
  • Cover FX Conceal FX Camouflage Concealer in Medium [under eye & nose]
  • Maybelline Dream Matte Powder in Honey - Medium 3-4  [to set concealer & dusted lightly on T-zone]
  • Too Faced Chocolate Soleil matte bronzing powder [contoured cheeks]
  • Dior Shimmer Powder in 002 Amber Diamond [cheekbone highlight]
  • Laura Geller's Blush-N-Brighten in Roseberry [cheeks] 
  •  Senna Cosmetics' Sketch-a-Brow Pencil in Dark Taupe


You can see a bit more of my gorgeous Waseem Noor outfit in the pic below. I absolutely love the bold colours with the black. I didn't really match my makeup to my outfit this time.


By the way, I'm loving the MUFE Aqua Lip in 14C. The last 2 pictures show the colour the best.

Let me update you: BLOGLOVIN'INSTAGRAM FACEBOOK TWITTER
Read More »

Sunday, October 14, 2012

Butterfly on a Pearl

"Pearls lie not on the seashore. If thou desirest one thou must dive for it"
- Chinese Proverb


Price: $1.99

These cute earrings are from BornPrettyStore.com, where you can find tons of things for nail art, eyelashes, and a lot more. Use the coupon code "SAIMESEK31" for 10% off your purchase. 
Read More »

Sunday, October 7, 2012

Review: Dressing Up Your Nails Using Konad's m36 Plate

Spending time doing nail art is something that I usually stay away from since I find it time consuming & messy because I'm not really good at it so I waste more time fixing mistakes. The Konad stamping nail art kit, however, makes the whole nail art process a bit easier for me.

Base nail polish: Pure Ice in Electric!

The Basic Nail Art Stamping Kit by Konad that I received from Nail Polish Canada includes the stamper, scraper, mini Konad nail polish, & the m36 plate.

Price: $17 CAD


I looked at the directions first because I've never tried nail art stamping & the process looked pretty simple, so I tried it. It took me 2 tries to get the hang of it, but after that it was fairly easy.

Base nail polish: Sally Hansen's Insta-Dry in 170 Expresso


Base nail polish: Maybelline's Color Show Metallics in 100 Navy Narcissist

Base nail polish: Mary Kay in Radiant Red
This design is purposely close the edge because I wanted it to look like the butterflies were flying away.

For some of the designs, the edges didn't transfer properly because I didn't pick it up on the stamper very well. However, the more I practised, the better I got at it.

There were also times when I got delayed by maybe 3 seconds but by then the stamper didn't pick the nail polish. I think this was the most challenging part about the whole process but speed is something that you'd pick up with time as soon as you're comfortable with the process.

Another thing that will require more practice (or just being careful & quick) is if you would like to transfer the design to the edge of your nail, you might have to play around with the placement till you get it right.

Here are all the designs on the Konad m36 plate up close.

Overall, doing nail art with the help of the Konad stamping nail art kit was fun & easy; it just took a bit of practice & speed. I loved the second nail art design that I did in this post (the rose design across the top of each nail) - it was beautiful & looked like I spent a long time doing it!

Nail Polish Canada also sells various Konad stamping plates for under $10. I was browsing through some of them & I absolutely LOVE Konad's image plate #S6 because of the bold designs.


Have you tried any stamping nail art kits? How was your experience?
Read More »